Lincoln Navigator: Front End Body Panels / Active Grille Shutter. Removal and Installation
Removal
NOTE: Removal steps in this procedure may contain installation details.
Upper active grille shutter
-
Remove the headlamp assemblies.
Refer to: Headlamp Assembly (417-01 Exterior Lighting, Removal and Installation).
-
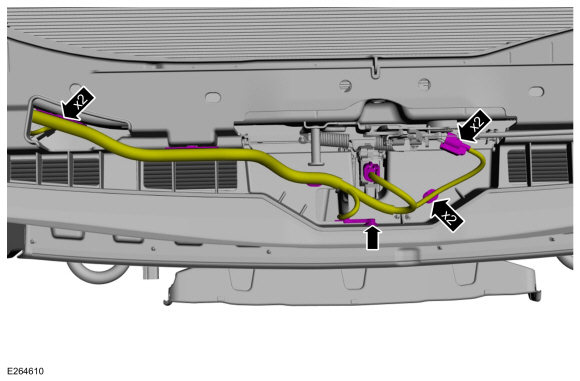
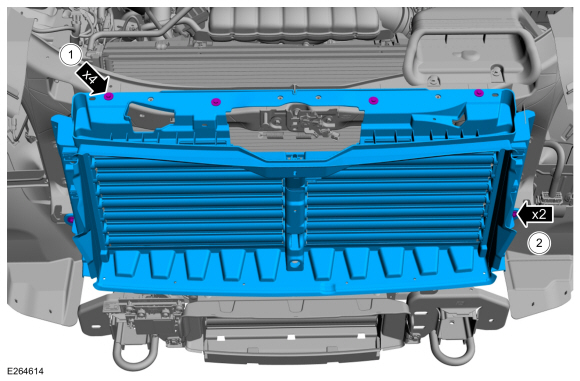
Disconnect the electrical connectors and detach the wire harness retainer.
 |
-
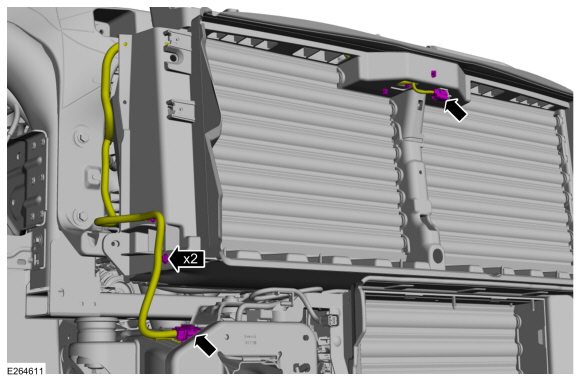
Disconnect the electrical connectors and detach the wire harness retainer.
 |
-
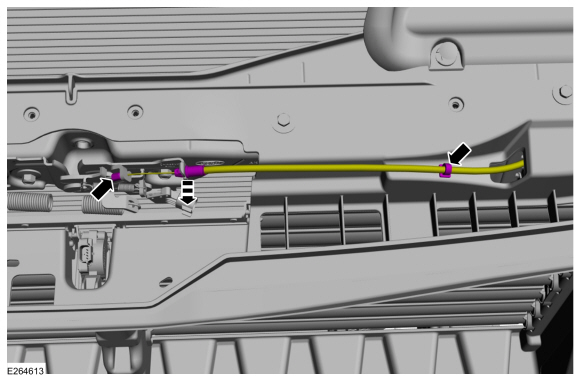
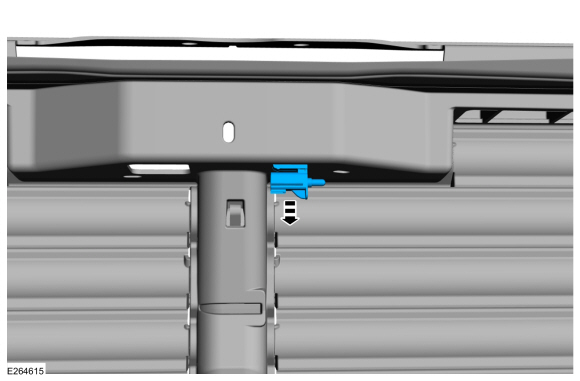
Disconnect the hood latch release cable and detach the cable retainer.
 |
-
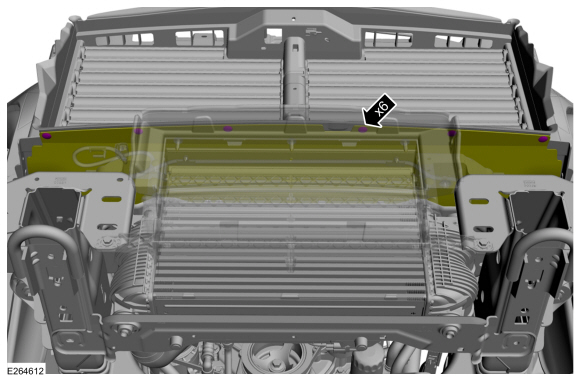
Remove the retainers and separate the air deflector from the active grille shutter.
 |
-
Remove the bolts and remove the upper active grille shutter.
Torque:
1: 36 lb.in (4.1 Nm)
2: 159 lb.in (18 Nm)
 |
-
NOTE: This step is only necessary when installing a new component.
Remove the ambient air temperature sensor.
 |
Lower active grille shutter
-
Remove the front bumper.
Refer to: Front Bumper (501-19 Bumpers, Removal and Installation).
-
Remove the CCM bracket
Refer to: Cruise Control Module (CCM) (419-03A Cruise Control - Vehicles With: Adaptive Cruise Control, Removal and Installation).
-
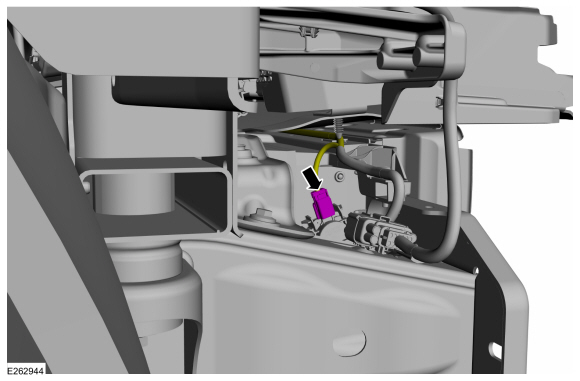
Disconnect the active grille actuator electrical connector.
 |
-
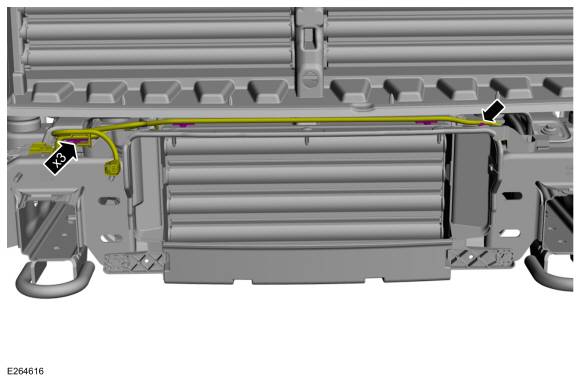
Remove the pin-type retainers and position aside the wire harness.
 |
-
Remove the bolts.
Torque: 97 lb.in (11 Nm)
 |
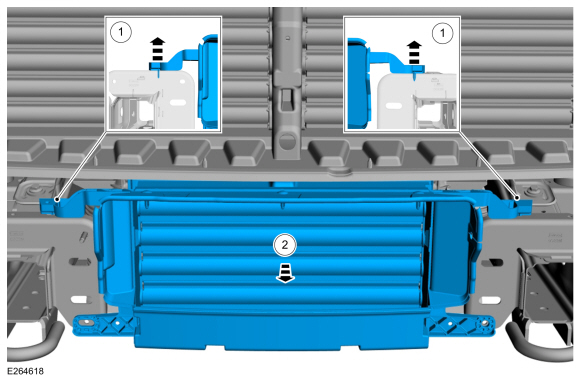
-
Remove the lower active grille shutter.
-
Lift up the lower active grill shutter.
-
Pull out and remove the lower active grille shutter.
-
Lift up the lower active grill shutter.
 |
Installation
-
To install, reverse the removal procedure.
 Active Grille Shutter. Diagnosis and Testing
Diagnostic Trouble Code (DTC) Chart
Diagnostics in this manual assume a certain skill level and knowledge of Ford-specific diagnostic practices. REFER to: Diagnostic Methods (100-00 General Information, Description and Operation)...
 Active Grille Shutter Actuator. Removal and Installation
Removal
Upper active grille shutter actuator
Remove the upper active grille shutter.
Refer to: Active Grille Shutter (501-02 Front End Body Panels, Removal and Installation)...
Other information:
Lincoln Navigator 2018-2025 Workshop Manual: Transfer Case. Installation
If removed, install the vibration damper to the transfer case. Torque: 177 lb.in (20 Nm) NOTE: The help of an assistant will be required. Position the transfer case on the crossmember...
Lincoln Navigator 2018-2025 Workshop Manual: Fixed Glass. General Procedures
Special Tool(s) / General Equipment Power Caulk Gun Power Fixed Glass Removal Tool Cold Knife Knife Vacuum Cleaner Materials Name Specification Sika® SikaTack® MACH 60 / Sika® SikaTack® MACH 30 / Dow® BETASEAL™ Express - Sika Tack ASAP Urethane Adhesive - Motorcraft® Ultra-Clear Spray Glas..
Categories
- Manuals Home
- 4th Gen Lincoln Navigator Service Manual (2018 - 2025)
- Brake Service Mode Activation and Deactivation. General Procedures
- SYNC Module [APIM]. Removal and Installation
- All Terrain Control Module (ATCM). Removal and Installation
- Body and Paint
- Rear Bumper. Removal and Installation
Front Stabilizer Bar Link. Removal and Installation
Removal
NOTICE: Suspension fasteners are critical parts that affect the performance of vital components and systems. Failure of these fasteners may result in major service expense. Use the same or equivalent parts if replacement is necessary. Do not use a replacement part of lesser quality or substitute design. Tighten fasteners as specified.
NOTE: Removal steps in this procedure may contain installation details.
With the vehicle in NEUTRAL, position it on a hoist.Refer to: Jacking and Lifting (100-02 Jacking and Lifting, Description and Operation).
NOTICE: Do not use power tools to remove or install the stabilizer bar