Lincoln Navigator: Roof Opening Panel / Air Deflector. Removal and Installation
Special Tool(s) /
General Equipment
| Rivet Gun |
| Electric Drill |
| 6 mm Drill Bit |
| Punch |
| Vacuum Cleaner |
Removal
NOTE:
Removal steps in this procedure may contain installation details.
-
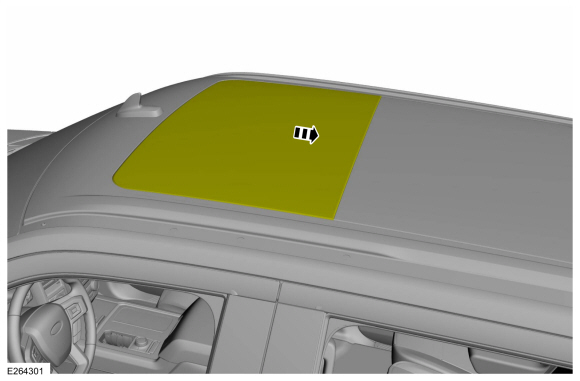
Fully open the roof opening panel glass.
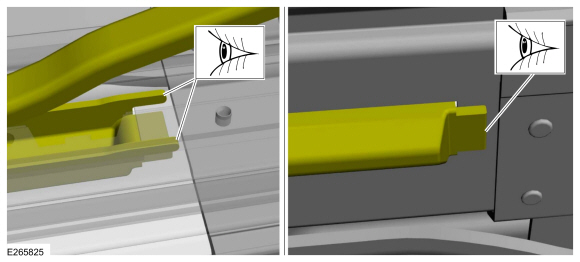
-
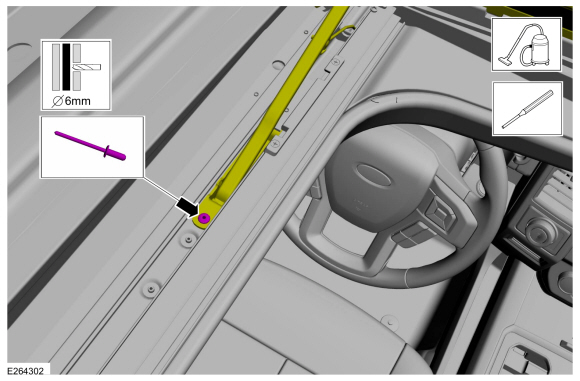
On both sides.
Drill the rivets and position the air deflector arm aside.
Use the General Equipment: Electric Drill
Use the General Equipment: 6 mm Drill Bit
Use the General Equipment: Punch
Use the General Equipment: Vacuum Cleaner
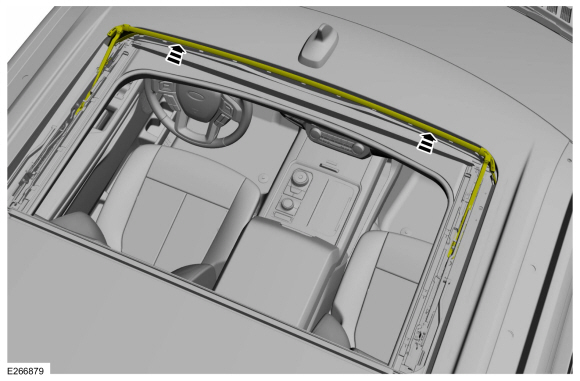
-
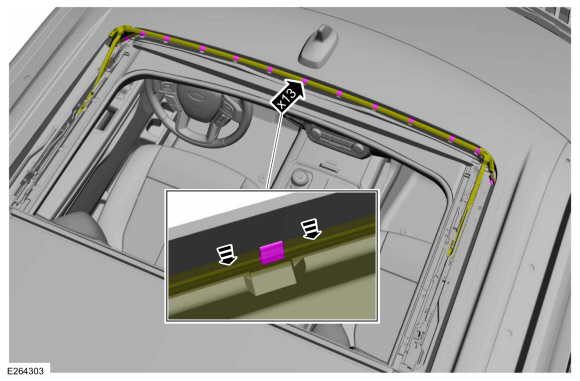
Push downward on the air deflector material and separate the material from the tabs.
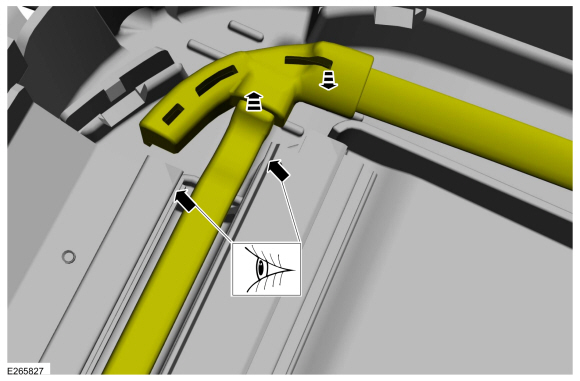
-
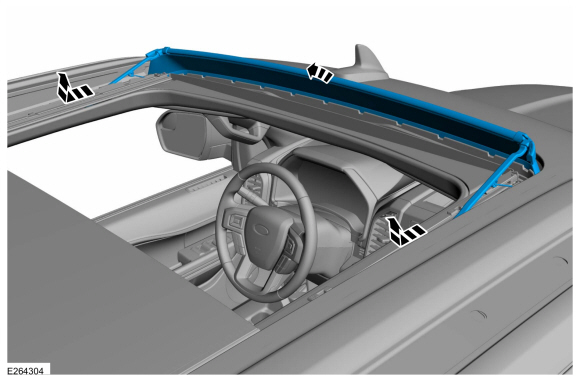
Slide the air deflector arms rearward in the frame
rails, roll the arms out of the rails and remove the air deflector.
Installation
-
On both sides.
Insert the air deflector bracket to the track channel.
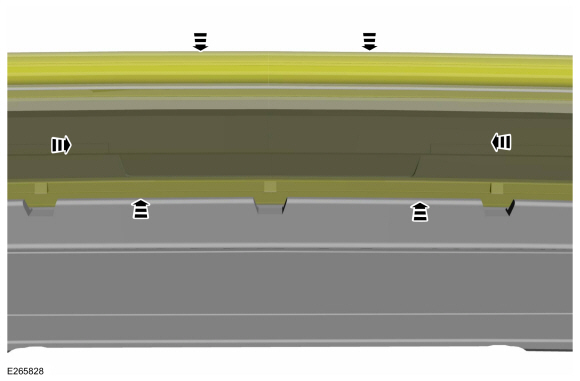
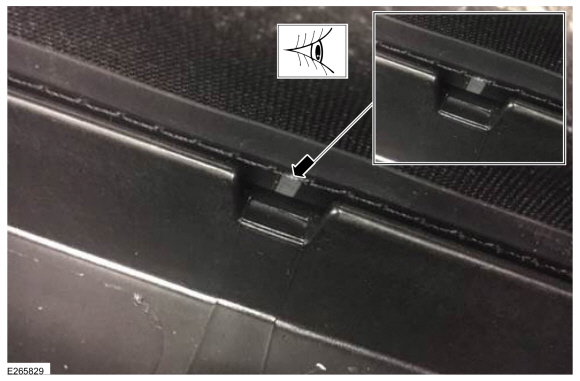
-
On both sides.
Make sure the air deflector bracket top and bottom tabs are properly fitted in place.
-
On both sides.
Install the air deflector arm and the rivet.
|
Item
|
Blind Rivet
|
|
1
|
W790368-S900
|
Use the General Equipment: Rivet Gun
-
Install the air deflector fabric material under the frame tabs.
-
On both sides.
Cycle the air deflector up and down manually and check for the contact to the track channel.
-
If the air deflector is contacting to the track channel,
adjust the air deflector fabric in the bottom channel to the side that
is making the contact and cycle again.
-
Repeat step 6 until the contact condition is eliminated.
-
Make sure the alignment mark on the deflector is aligned
with the center frame tab opening. Move the deflector material from
side-to-side as necessary.
-
Carry out the roof opening panel initialization.
Refer to: Power Roof Opening Panel Initialization (501-17 Roof Opening Panel, General Procedures).
Adjustment
NOTE:
Fixed Glass Panel
NOTE:
If both glass panels are being aligned, align the fixed glass panel before aligning the sliding glass panel...
Removal
The roof opening panel switch is replaced as an assembly with the overhead console.
Refer to: Overhead Console (501-12 Instrument Panel and Console, Removal and Installation)...
Other information:
Removal
NOTE:
Removal steps in this procedure may contain installation steps.
With the vehicle in NEUTRAL, position it on a hoist.
Refer to: Jacking and Lifting (100-02 Jacking and Lifting, Description and Operation).
Disconnect the battery ground cable...
Materials
Name
Specification
Motorcraft® High Temperature Nickel Anti-Seize LubricantXL-2
-
Motorcraft® Metal Brake Parts CleanerPM-4-A, PM-4-B, APM-4-C
-
Removal
NOTICE:
The turbocharger compressor vanes can be damaged by even the
smallest particles...


 Roof Opening Panel Alignment. General Procedures
 Roof Opening Panel Control Switch. Removal and Installation