Lincoln Navigator: Exterior Trim and Ornamentation / Roof Rail. Removal and Installation
Special Tool(s) / General Equipment
| Interior Trim Remover |
Removal
NOTE: Removal steps in this procedure may contain installation details.
NOTE: RH side shown, LH side similar.
-
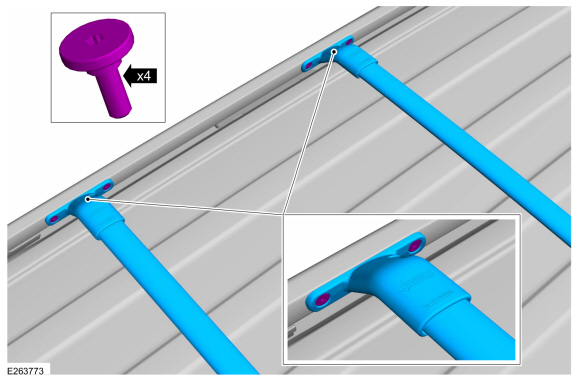
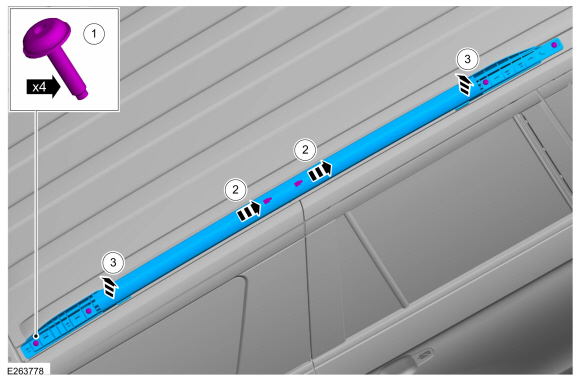
If equipped.
Remove the bolts and the roof luggage carriers.
Torque: 36 lb.in (4.1 Nm)
 |
-
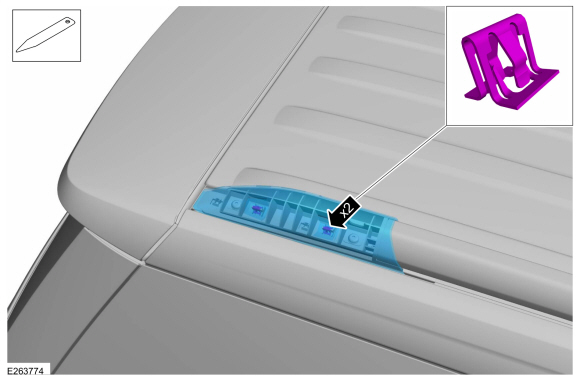
Using a non-marring trim tool, disengage retainer clips
on the rear roof rail cover and remove the rear roof rail cover.
Use the General Equipment: Interior Trim Remover
 |
-
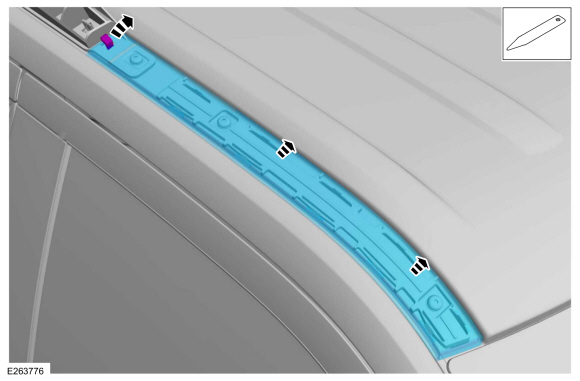
Using a non-marring trim tool, disengage retainer clips
on the front roof rail cover and remove the front roof rail cover.
Use the General Equipment: Interior Trim Remover
 |
-
Using a non-marring trim removal tool, remove the roof ditch joint finisher.
Use the General Equipment: Interior Trim Remover
 |
-
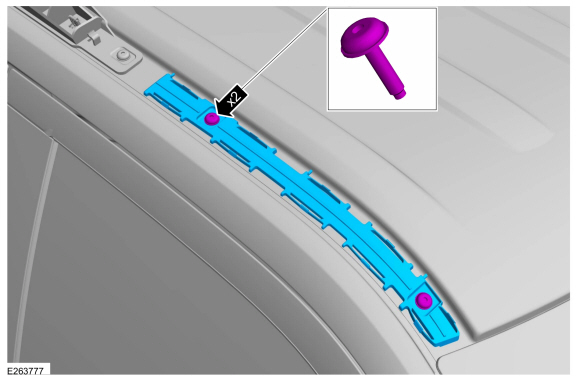
Remove the bolts and the roof ditch joint finisher fixing.
Torque: 36 lb.in (4.1 Nm)
 |
-
Remove the roof rail.
-
Remove the roof rail bolts.
Torque: 36 lb.in (4.1 Nm)
-
Push the roof rail towards front and release from center support tabs.
-
Remove the roof rail.
-
Remove the roof rail bolts.
 |
Installation
-
To install, reverse the removal procedure.
 Rear Spoiler. Removal and Installation
Removal
NOTE:
Removal steps in this procedure may include installation details.
Open the liftgate.
NOTE:
For clarity Liftgate is not shown...
 Running Board. Removal and Installation
Removal
NOTE:
Removal steps in this procedure may contain installation details.
LH side shown, RH side similar.
With the vehicle in NEUTRAL, position it on a hoist...
Other information:
Lincoln Navigator 2018-2025 Workshop Manual: Evaporative Emission Canister. Removal and Installation
Removal WARNING: Do not smoke, carry lighted tobacco or have an open flame of any type when working on or near any fuel-related component. Highly flammable mixtures may be present and may be ignited. Failure to follow these instructions may result in serious personal injury...
Lincoln Navigator 2018-2025 Workshop Manual: Second Row Seat Cushion Blower Motor. Removal and Installation
Removal NOTE: Right hand (RH) shown, left hand (LH) similar. Remove the second row seat. Refer to: Second Row Seat (501-10B Second Row Seats, Removal and Installation). Disconnect the second row seat cushion blower motor electrical connector...
Categories
- Manuals Home
- 4th Gen Lincoln Navigator Service Manual (2018 - 2025)
- Rear Bumper. Removal and Installation
- Front Seat. Removal and Installation
- All Terrain Control Module (ATCM). Removal and Installation
- Identification Codes. Description and Operation
- Vehicle Dynamics Control Module (VDM). Removal and Installation
Axle Tube Bearing. Removal and Installation
Special Tool(s) / General Equipment
 205-123
(T78P-1177-A)
205-123
(T78P-1177-A)
Installer, Axle Shaft Oil Seal
 308-047
(T77F-1102-A)
308-047
(T77F-1102-A)
Remover, Bearing Cup Slide Hammer