Lincoln Navigator: Engine - 3.5L EcoBoost (272kW/370PS) / Exhaust Manifold LH. Removal and Installation
Materials
| Name | Specification |
|---|---|
| Motorcraft® Metal Surface Prep Wipes ZC-31-B |
- |
Removal
-
With the vehicle in NEUTRAL, position it on a hoist.
Refer to: Jacking and Lifting (100-02 Jacking and Lifting, Description and Operation).
-
Remove the LH turbocharger.
Refer to: Turbocharger LH (303-04B Fuel Charging and Controls - Turbocharger - 3.5L EcoBoost (272kW/370PS), Removal and Installation).
-
-
Remove and discard the nuts.
-
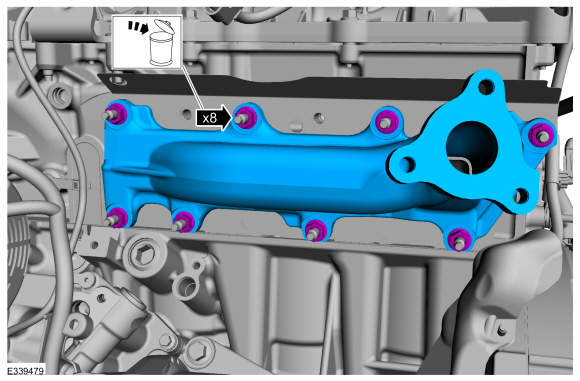
Remove the exhaust manifold.
-
Remove and discard the nuts.
 |
-
Remove and discard the exhaust manifold gasket and studs.
 |
-
-
Clean and inspect the exhaust manifold.
Refer to: Exhaust Manifold Cleaning and Inspection (303-00 Engine System - General Information, General Procedures).
-
NOTICE: Do not use metal scrapers, wire brushes, power abrasive discs or other abrasive means to clean the sealing surfaces. These may cause scratches and gouges resulting in leak paths. Use a plastic scraper to clean the sealing surfaces.
Clean the exhaust manifold mating surface of the cylinder head with metal surface prep wipes. Follow the directions on the packaging.
Material: Motorcraft® Metal Surface Prep Wipes / ZC-31-B
-
Clean and inspect the exhaust manifold.
 |
Installation
-
-
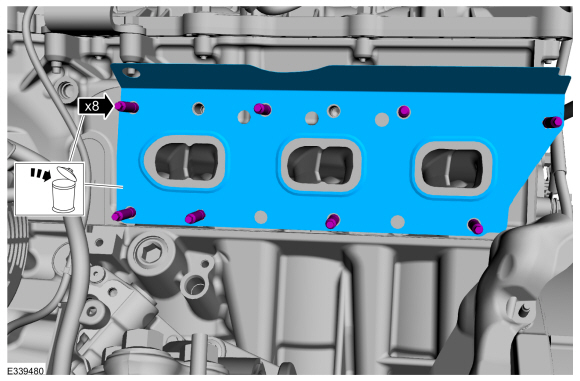
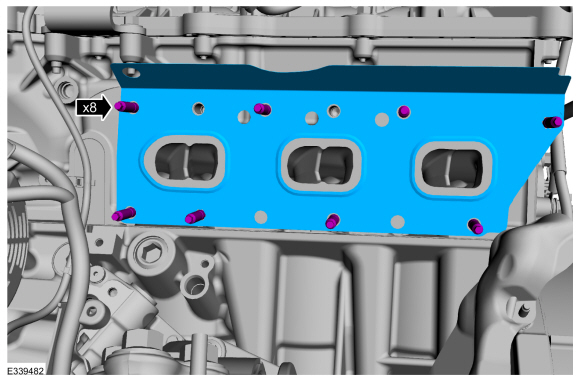
Hand start the new exhaust manifold studs.
Torque: 115 lb.in (13 Nm)
-
Tighten the new exhaust manifold studs.
Torque: 115 lb.in (13 Nm)
-
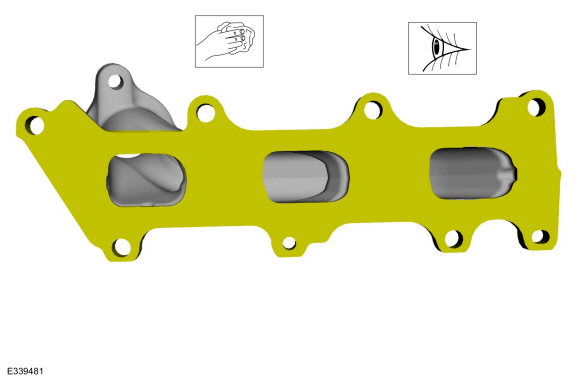
Install a new gasket.
-
Hand start the new exhaust manifold studs.
 |
-
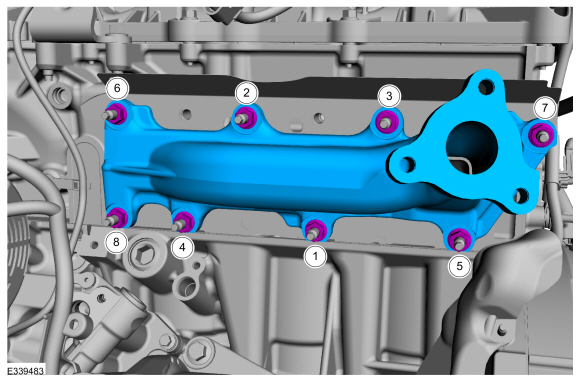
Install the exhaust manifold and new nuts in the sequence shown.
Torque:
Stage 1: 142 lb.in (16 Nm)
Stage 2: 16 lb.ft (22 Nm)
 |
-
Install the LH turbocharger.
Refer to: Turbocharger LH (303-04B Fuel Charging and Controls - Turbocharger - 3.5L EcoBoost (272kW/370PS), Removal and Installation).

 Exhaust Manifold RH. Removal and Installation
Materials
Name
Specification
Motorcraft® Metal Surface Prep WipesZC-31-B
-
Removal
With the vehicle in NEUTRAL, position it on a hoist...
Other information:
Lincoln Navigator 2018-2025 Workshop Manual: Differential Carrier. Removal and Installation
Special Tool(s) / General Equipment 205-220Installer, Differential ShimTKIT-1985-FH 307-003 (T57L-500-B) Holding Fixture, Transmission Materials Name Specification Motorcraft® Ultra Silicone SealantTA-29 WSS-M4G323-A8 Removal Remove the rear drive axle assembly Refer to: Axle Assembly (205-02 Rear Drive Axle..
Lincoln Navigator 2018-2025 Workshop Manual: Axle Shaft Seal. Removal and Installation
Special Tool(s) / General Equipment 205-153 (T80T-4000-W) Handle 206-034 (T88P-20202-B) Installer, Wheel Speed Sensor RingTKIT-1988-FLMTKIT-1988-LM 307-397Remover, Transmission Fluid PumpTKIT-2002N-DEWTKIT-2000AP-FLM/LM Slide Hammer Removal Remove the halfshaft. Refer to: Halfshaft (205-04 Front Drive Halfshafts, Removal a..
Categories
- Manuals Home
- 4th Gen Lincoln Navigator Service Manual (2018 - 2025)
- Liftgate Trim Panel. Removal and Installation
- Satellite Radio Antenna. Removal and Installation
- Front Bumper Cover. Removal and Installation
- Rear Bumper. Removal and Installation
- Remote Function Actuator (RFA) Module. Removal and Installation
Rear Camber Adjustment. General Procedures
Special Tool(s) / General Equipment
Wheel Alignment SystemActivation
NOTICE: Suspension fasteners are critical parts that affect the performance of vital components and systems. Failure of these fasteners may result in major service expense. Use the same or equivalent parts if replacement is necessary. Do not use a replacement part of lesser quality or substitute design. Tighten fasteners as specified.
Using alignment equipment and the manufacturer's instructions, measure the rear camber.Use the General Equipment: Wheel Alignment System