Lincoln Navigator: Engine Cooling - 3.5L EcoBoost (272kW/370PS) / Cooling Module. Removal and Installation
Special Tool(s) / General Equipment
| Hose Clamp Remover/Installer |
Removal
NOTE: Removal steps in this procedure may contain installation details.
-
With the vehicle in NEUTRAL, position it on a hoist.
Refer to: Jacking and Lifting (100-02 Jacking and Lifting, Description and Operation).
-
Drain the cooling system.
Refer to: Engine Cooling System Draining, Vacuum Filling and Bleeding (303-03 Engine Cooling - 3.5L EcoBoost (272kW/370PS), General Procedures).
-
Evacuate the A/C system.
Refer to: Air Conditioning (A/C) System Recovery, Evacuation and Charging (412-00 Climate Control System - General Information, General Procedures).
-
Remove the air cleaner outlet pipe.
Refer to: Air Cleaner Outlet Pipe (303-12 Intake Air Distribution and Filtering - 3.5L EcoBoost (272kW/370PS), Removal and Installation).
-
Remove the air cleaner.
Refer to: Air Cleaner (303-12 Intake Air Distribution and Filtering - 3.5L EcoBoost (272kW/370PS), Removal and Installation).
-
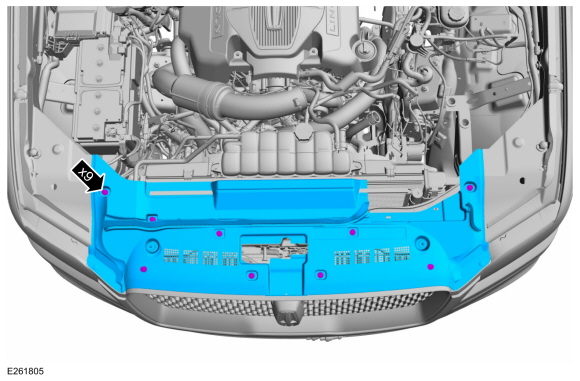
Remove the pin-type retainers and the upper radiator air deflector.
 |
-
Remove the bolts and position the degas bottle aside.
Torque: 62 lb.in (7 Nm)
 |
-
Disconnect the electrical connectors, detach the pin-type retainers and position the wiring harness aside.
 |
-
Remove the upper active grille shutter.
Refer to: Active Grille Shutter (501-02 Front End Body Panels, Removal and Installation).
-
-
Detach the cable from the mounting bracket.
-
Disconnect the hood latch release cable end.
-
Detach the cable from the mounting bracket.
 |
-
Remove the pin-type retainers and position the air deflector aside.
 |
-
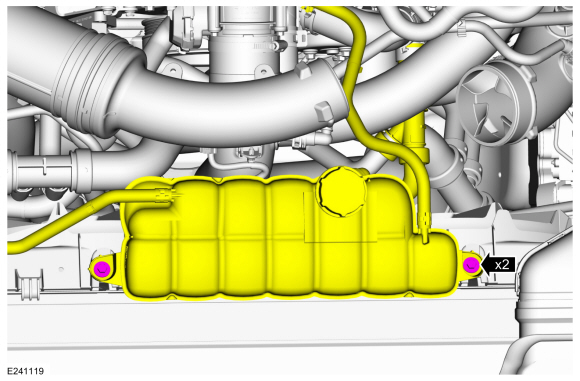
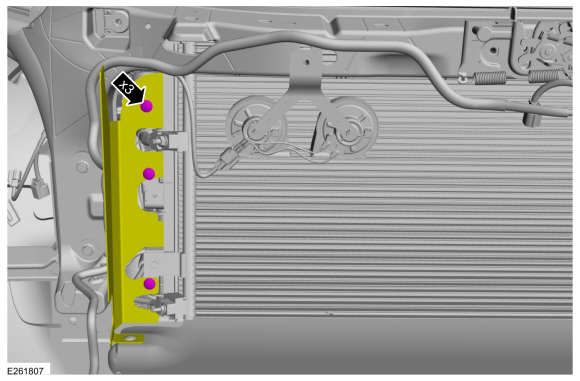
Detach the battery cable pin-type retainer.
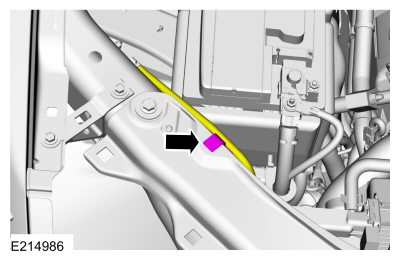 |
-
Disconnect the electrical connectors. Detach the wiring
harness retainers and position the wiring harness between the radiator
and the radiator grille support.
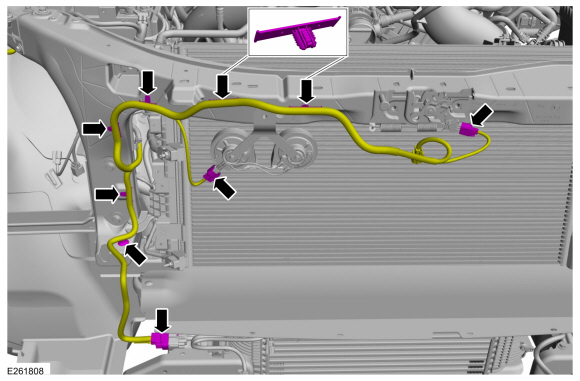 |
-
NOTICE: Make sure all openings are sealed.
Remove the condenser inlet and outlet nuts and disconnect the fittings.
Torque:
Stage 1: 71 lb.in (8 Nm)
Stage 2: 133 lb.in (15 Nm)
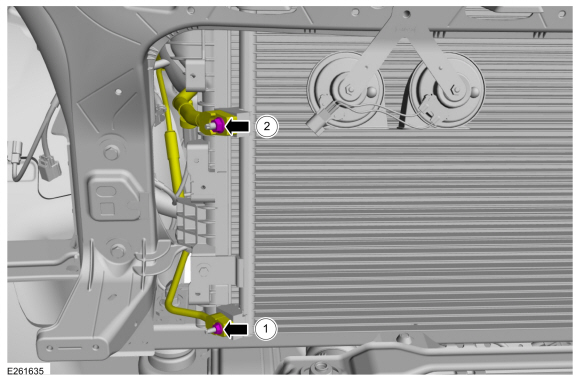 |
-
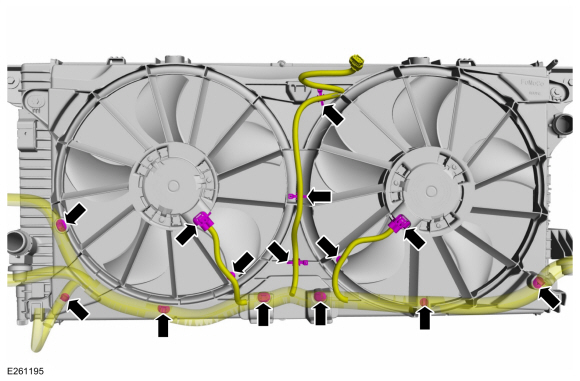
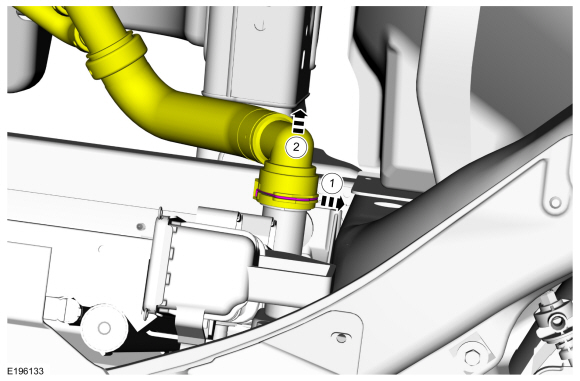
Release the clamps and disconnect the upper radiator hose and the coolant hose.
Use the General Equipment: Hose Clamp Remover/Installer
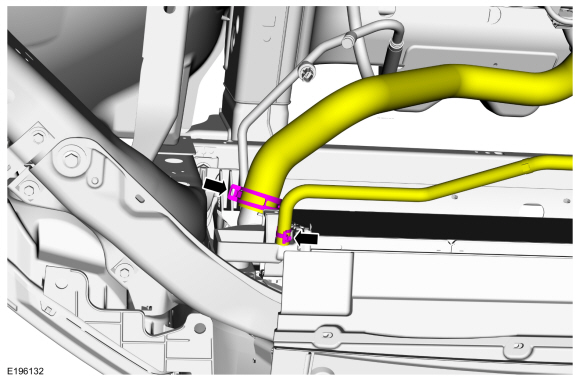 |
-
Pull the lower radiator hose spring clip until the end
of the clip is in the detent on the quick connect coupling and
disconnect the lower radiator hose.
 |
-
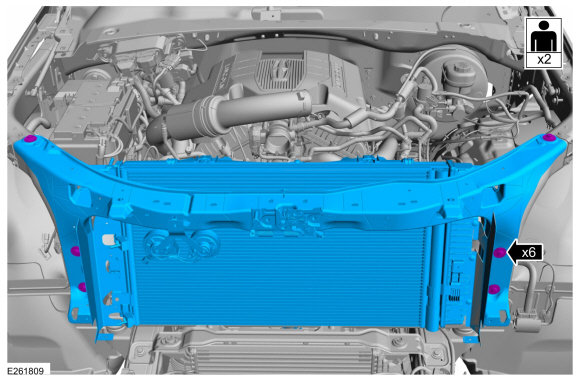
Remove the retainers and the cooling module.
Torque: 22 lb.ft (30 Nm)
 |
Installation
-
To install, reverse the removal procedure.
-
NOTICE: Use only the specified material to lubricate the seals.
Install new condenser fitting O-ring seals and lubricate them with clean refrigerant oil.
Refer to: Specifications (412-00 Climate Control System - General Information, Specifications).
-
Fill and bleed the cooling system.
Refer to: Engine Cooling System Draining, Vacuum Filling and Bleeding (303-03 Engine Cooling - 3.5L EcoBoost (272kW/370PS), General Procedures).
 Cooling Fan Motor and Shroud. Removal and Installation
Removal
With the vehicle in NEUTRAL, position it on a hoist.
Refer to: Jacking and Lifting (100-02 Jacking and Lifting, Description and Operation)...
 Degas Bottle. Removal and Installation
Special Tool(s) /
General Equipment
Fluid Suction Gun
Hose Clamp Remover/Installer
Locking Pliers
Materials
Name
Specification
Motorcraft® Yellow Concentrated Antifreeze/CoolantVC-13-G
WSS-M97B57-A1
Motorcraft® Orange Concentrated Antifreeze/CoolantVC-3-B
WSS-M97B44-D
Removal
WARNING:
Alway..
Other information:
Lincoln Navigator 2018-2025 Workshop Manual: High-Pressure Fuel System. Diagnosis and Testing
Diagnostic Trouble Code (DTC) Chart Diagnostics in this manual assume a certain skill level and knowledge of Ford-specific diagnostic practices. REFER to: Diagnostic Methods (100-00 General Information, Description and Operation). Module DTC Description Action PCM P0001:00 Fuel Volume Regulator 'A' Control Circuit/Open: No Sub Type Information GO to Pinpoint Test H..
Lincoln Navigator 2018-2025 Workshop Manual: High-Pressure Fuel Pump. Removal and Installation
Removal NOTICE: Do not loosen any fittings or plugs on the high-pressure fuel pump. With the vehicle in NEUTRAL, position it on a hoist. Refer to: Jacking and Lifting (100-02 Jacking and Lifting, Description and Operation). Remove the engine appearance cover retainers, release the engine appearance cover from the rear retaining tabs on the inta..
Categories
- Manuals Home
- 4th Gen Lincoln Navigator Service Manual (2018 - 2025)
- Vehicle Dynamics Control Module (VDM). Removal and Installation
- Remote Function Actuator (RFA) Module. Removal and Installation
- Front Bumper Cover. Removal and Installation
- Rear Bumper. Removal and Installation
- Front Bumper. Removal and Installation
Front Driveshaft. Removal and Installation
Special Tool(s) / General Equipment
Crimping ToolMaterials
Name Specification Motorcraft® Premium Long-Life GreaseXG-1-E1 ESA-M1C75-B
Removal
With the vehicle in NEUTRAL, position the vehicle on a hoist.Refer to: Jacking and Lifting (100-02 Jacking and Lifting, Description and Operation).
Remove the bolts and the transmission shield.