Lincoln Navigator: Handles, Locks, Latches and Entry Systems / Hood Latch Release Cable. Removal and Installation
Removal
-
Remove the hood latch release handle.
Refer to: Hood Latch Release Handle (501-14 Handles, Locks, Latches and Entry Systems, Removal and Installation).
-
Remove the air cleaner.
Refer to: Air Cleaner (303-12 Intake Air Distribution and Filtering - 3.5L EcoBoost (272kW/370PS), Removal and Installation).
-
Remove the front bumper cover.
Refer to: Front Bumper Cover (501-19 Bumpers, Disassembly and Assembly).
-
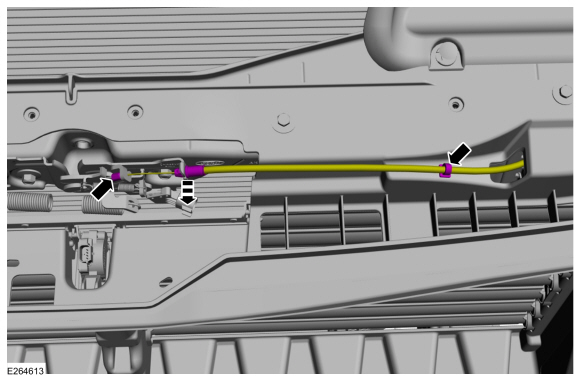
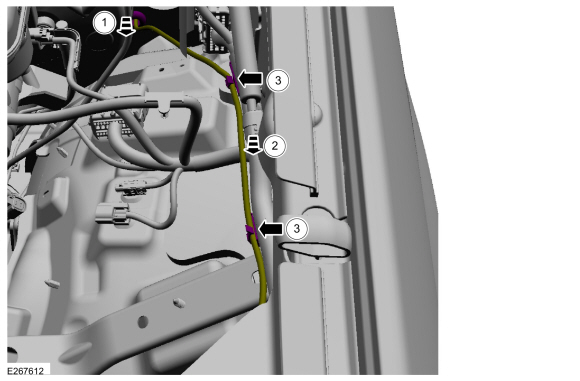
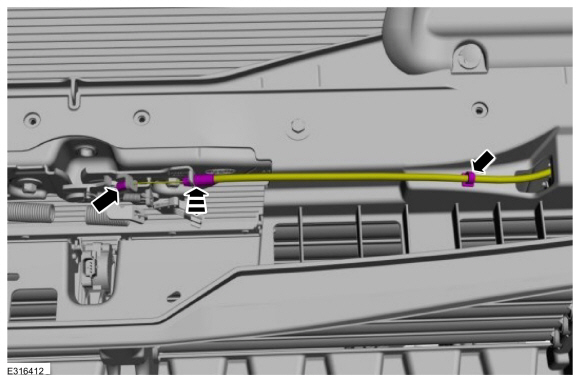
Release the cable routing clip and detach the hood latch release cable from the hood latch.
 |
-
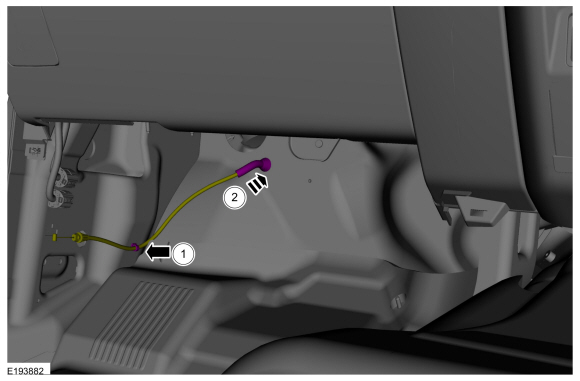
Route the hood latch release cable through the cowl.
-
Release the cable routing clip.
-
Route the hood latch release cable through the cowl.
-
Release the cable routing clip.
 |
-
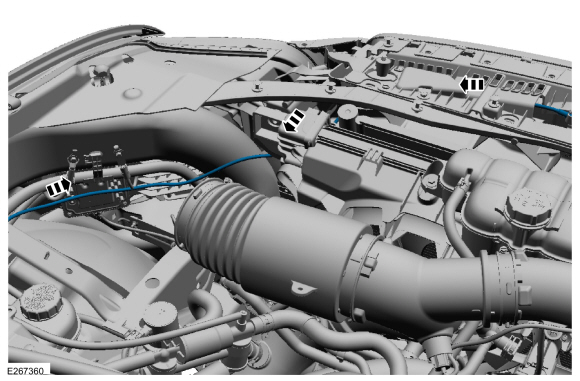
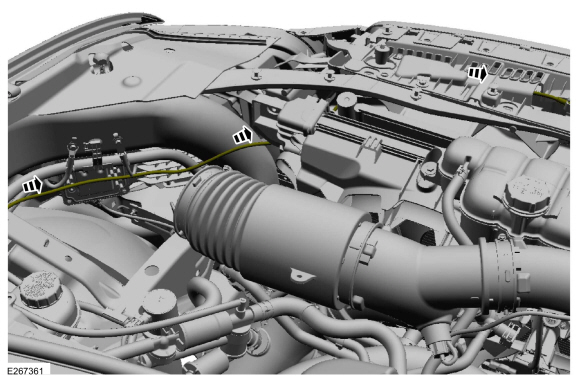
Route the hood latch release cable through the engine compartment.
-
Route the hood latch release cable through the cowl.
-
Release the cable routing clips.
-
Route the hood latch release cable through the engine compartment.
-
Route the hood latch release cable through the cowl.
 |
-
Remove the hood latch release cable.
 |
Installation
-
Install the hood latch release cable.
-
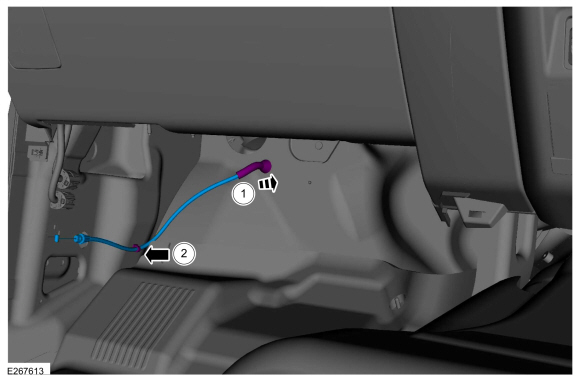
Route the hood latch release cable through the cowl.
-
Attach the cable routing clip.
-
Route the hood latch release cable through the cowl.
 |
-
Route the hood latch release cable through the engine compartment.
-
Route the hood latch release cable through the cowl.
-
Route the hood latch release cable through the engine compartment.
-
Attach the cable routing clips.
-
Route the hood latch release cable through the cowl.
 |
-
Route the hood latch release cable.
 |
-
Attach the hood latch release cable to the hood latch and attach the cable routing clip.
 |
-
Install the front bumper cover.
Refer to: Front Bumper Cover (501-19 Bumpers, Disassembly and Assembly).
-
Install the air cleaner.
Refer to: Air Cleaner (303-12 Intake Air Distribution and Filtering - 3.5L EcoBoost (272kW/370PS), Removal and Installation).
-
Install the hood latch release handle.
Refer to: Hood Latch Release Handle (501-14 Handles, Locks, Latches and Entry Systems, Removal and Installation).
 Hood Latch. Removal and Installation
Removal
NOTE:
Removal steps in this procedure may contain installation details.
Remove the pin-type retainers and position the air cleaner panel aside
Release the clips and position the RH and LH cowl filler panels aside...
 Hood Latch Release Handle. Removal and Installation
Removal
NOTE:
Removal steps in this procedure may contain installation details.
Position the front door weatherstrip aside.
Remove the front door scuff plate trim panel...
Other information:
Lincoln Navigator 2018-2025 Workshop Manual: Third Row Seatbelt Retractor - Long Wheelbase. Removal and Installation
Removal NOTE: Removal steps in this procedure may contain installation details. NOTE: RH shown, LH similar. Remove the load space trim panel. Refer to: Loadspace Trim Panel (501-05 Interior Trim and Ornamentation, Removal and Installation)...
Lincoln Navigator 2018-2025 Workshop Manual: Driveshaft Universal Joint. Disassembly and Assembly
Special Tool(s) / General Equipment 205-086 (T74P-4635-C) Installer/Remover, C-Frame and Screw Vise Materials Name Specification Motorcraft® Premium Long-Life GreaseXG-1-E1 ESA-M1C75-B DISASSEMBLY NOTICE: Do not, under any circumstance, clamp the driveshaft assembly in the jaws of a vise or similar holding fixture...
Categories
- Manuals Home
- 4th Gen Lincoln Navigator Service Manual (2018 - 2025)
- Front Bumper Cover. Removal and Installation
- Rear Bumper. Removal and Installation
- Head Up Display (HUD) Module Calibration. General Procedures
- Identification Codes. Description and Operation
- Satellite Radio Antenna. Removal and Installation
Rear Camber Adjustment. General Procedures
Special Tool(s) / General Equipment
Wheel Alignment SystemActivation
NOTICE: Suspension fasteners are critical parts that affect the performance of vital components and systems. Failure of these fasteners may result in major service expense. Use the same or equivalent parts if replacement is necessary. Do not use a replacement part of lesser quality or substitute design. Tighten fasteners as specified.
Using alignment equipment and the manufacturer's instructions, measure the rear camber.Use the General Equipment: Wheel Alignment System