Lincoln Navigator: Glass, Frames and Mechanisms / Rear Door Glass Run and Bracket. Removal and Installation
Removal
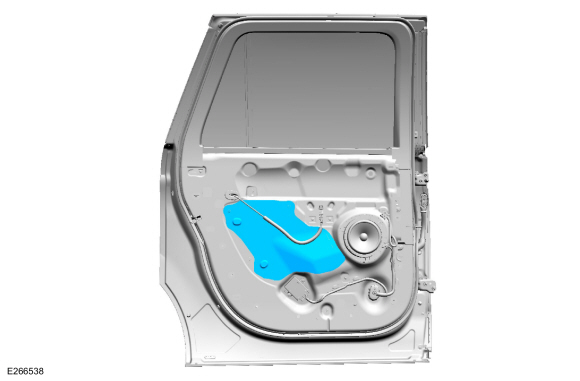
NOTE: LH side shown, RH side similar.
NOTE: Removal steps in this procedure may contain installation details.
Aft rear door glass run and bracket
-
Remove the rear door trim panel.
Refer to: Rear Door Trim Panel (501-05 Interior Trim and Ornamentation, Removal and Installation).
-
Remove the watershield.
 |
-
Remove the aft rear door glass run and bracket.
-
Remove the bolts from the aft rear door glass run and bracket.
Torque: 71 lb.in (8 Nm)
-
Remove the aft rear door glass run and bracket.
-
Remove the bolts from the aft rear door glass run and bracket.
 |
Fore rear door glass run and bracket
-
Remove the rear door trim panel.
Refer to: Rear Door Trim Panel (501-05 Interior Trim and Ornamentation, Removal and Installation).
-
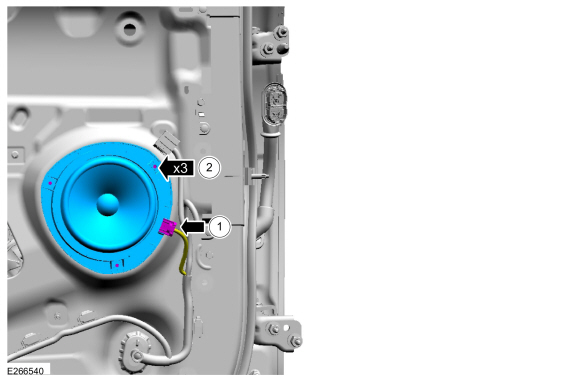
Remove the rear door speaker.
-
Disconnect the wiring harness electrical connector from the rear door speaker.
-
Remove screws and the rear door speaker.
Torque: 22 lb.in (2.5 Nm)
-
Disconnect the wiring harness electrical connector from the rear door speaker.
 |
-
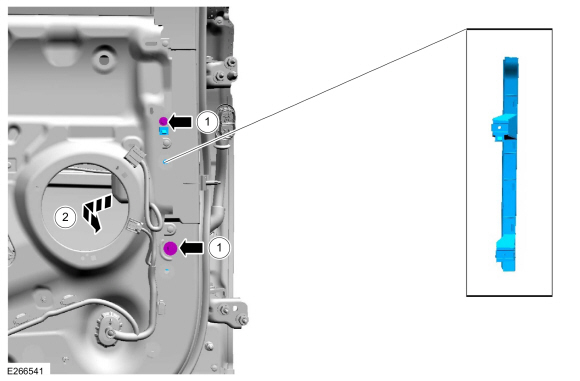
Remove the fore rear door glass run and bracket.
-
Remove the fore rear door glass run and bracket bolts.
Torque: 71 lb.in (8 Nm)
-
Remove the fore rear door glass run and bracket.
-
Remove the fore rear door glass run and bracket bolts.
 |
Installation
-
To install, reverse the removal procedure.
-
Carry out the power door window initialization.
Refer to: Power Door Window Initialization (501-11 Glass, Frames and Mechanisms, General Procedures).
 Passenger Door Window Control Switch. Removal and Installation
Removal
Remove the passenger front door trim panel.
Refer to: Front Door Trim Panel (501-05 Interior Trim and Ornamentation, Removal and Installation)...
 Rear Door Glass Top Run. Removal and Installation
Removal
NOTE:
LH side shown, RH side similar.
NOTE:
Removal steps in this procedure may contain installation details.
Remove the rear door window glass...
Other information:
Lincoln Navigator 2018-2024 Workshop Manual: Radiator Support Assembly. Removal and Installation
Special Tool(s) / General Equipment 6.5 mm Drill Bit Polydrive Bit Socket Rivet Gun Self-Piercing Rivet (SPR) Remover/Installer Belt Sander Hot Air Gun Materials Name Specification Seam SealerTA-2-B, 3M™ 08308, LORD Fusor® 803DTM - Removal NOTE: Aluminum body panels are highly receptive to heat tra..
Lincoln Navigator 2018-2024 Workshop Manual: Rear Thermostatic Expansion Valve. Removal and Installation
Removal NOTICE: During the removal or installation of components, cap, tape or otherwise appropriately protect all openings and tubes/fittings to prevent the ingress of dirt or other contamination. Remove caps, tape and other protective materials prior to installation. NOTE: Removal steps in this procedure may contain installation details. With the vehicle in..
Categories
- Manuals Home
- 4th Gen Lincoln Navigator Service Manual (2018 - 2024)
- Front Bumper Cover. Removal and Installation
- Service Information
- Identification Codes. Description and Operation
- All Terrain Control Module (ATCM). Removal and Installation
- Remote Function Actuator (RFA) Module. Removal and Installation
Rear Drive Halfshafts. Diagnosis and Testing
Preliminary Inspection
Visually inspect the CV joints, housing, boots, and clamps for obvious signs of mechanical damage.If an obvious cause for an observed or reported concern is found, correct the cause (if possible) before proceeding to the next step
If the cause is not visually evident, verify the symptom and REFER to Symptom Chart: NVH.