Lincoln Navigator: Roof Opening Panel / Roof Opening Panel Frame. Removal and Installation
Special Tool(s) /
General Equipment
Removal
NOTE:
Removal steps in this procedure may contain installation details.
-
NOTE:
The air deflector must be installed with the roof opening panel in the open position.
If replacing the roof opening panel frame, remove the air deflector.
Refer to: Air Deflector (501-17 Roof Opening Panel, Removal and Installation).
-
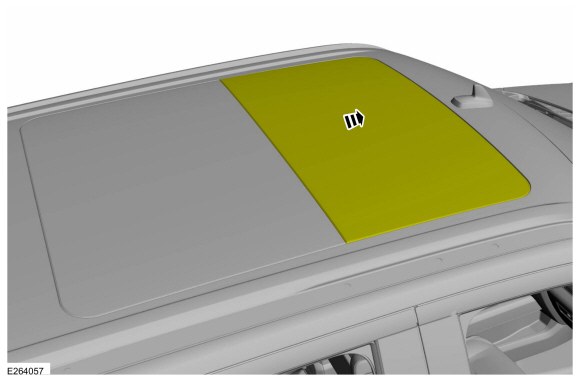
Fully close the roof opening panel glass.
-
Remove the roof opening panel glass.
Refer to: Roof Opening Panel Glass (501-17 Roof Opening Panel, Removal and Installation).
-
Fully open the roof opening panel shield.
-
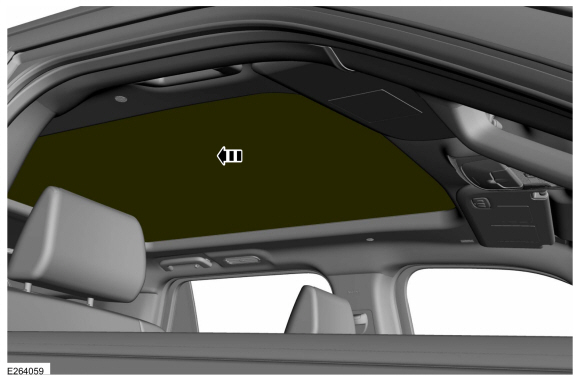
Remove the headliner.
Refer to: Headliner (501-05 Interior Trim and Ornamentation, Removal and Installation).
-
On both sides.
Remove the side curtain airbags.
Refer to: Side Curtain Airbag (501-20B Supplemental Restraint System, Removal and Installation).
-
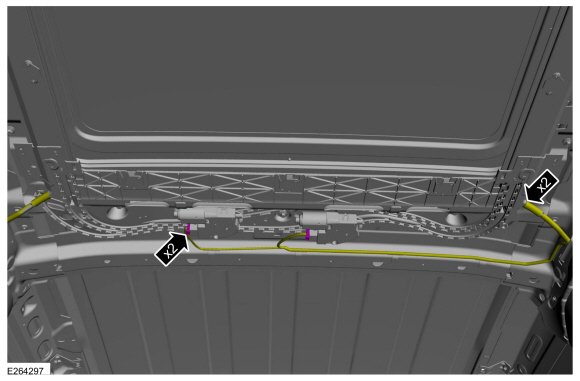
Detach the wiring harness pin-type retainer.
-
Disconnect the front drain tubes.
-
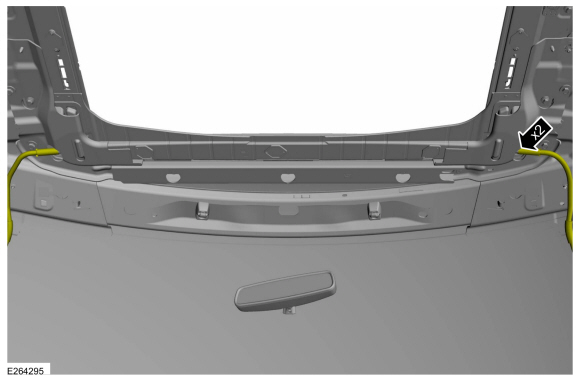
On the RH side.
Remove the nuts and grab handle bracket.
Torque:
133 lb.in (15 Nm)
-
Remove the front beam.
-
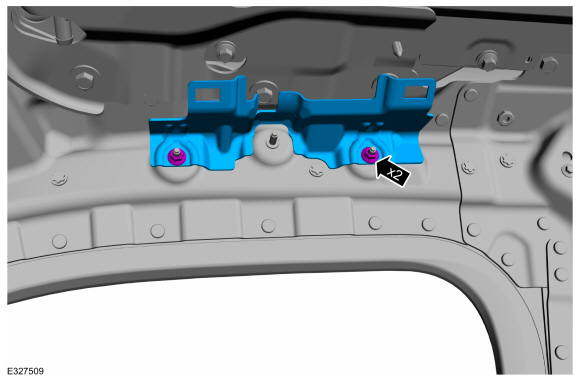
Remove the bolts.
Torque:
106 lb.in (12 Nm)
-
Detach the pin-type retainers, release the tabs and remove the front beam.
-
Disconnect the rear drain tubes and the roof opening panel motor electrical connectors.
-
Position the front and second row seats as shown.
-
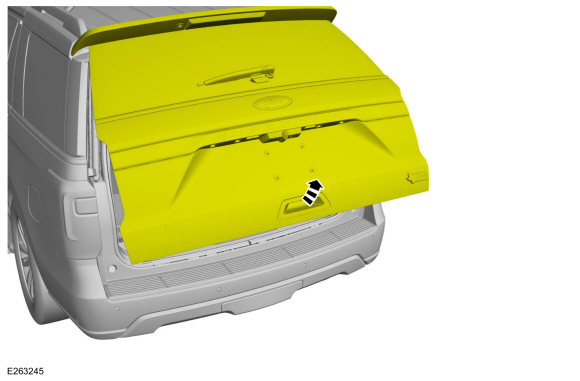
Open the liftgate.
-
On both sides.
Remove the nuts and grab handle bracket.
Torque:
133 lb.in (15 Nm)
-
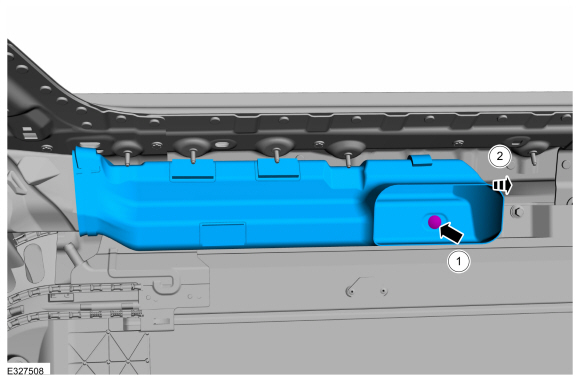
On both sides.
Remove the retainer and air duct.
-
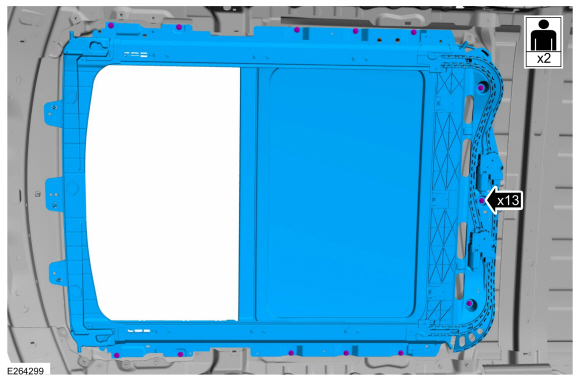
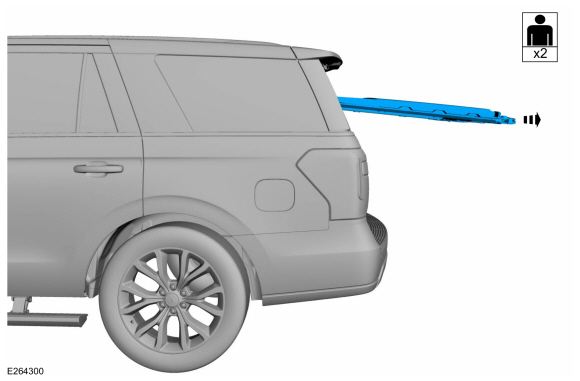
With the help of an assistant.
Remove the bolts and the roof opening panel frame.
Torque:
106 lb.in (12 Nm)
-
With the help of an assistant.
Remove the roof opening panel frame out the rear of the vehicle.
Installation
-
To install, reverse the removal procedure.
-
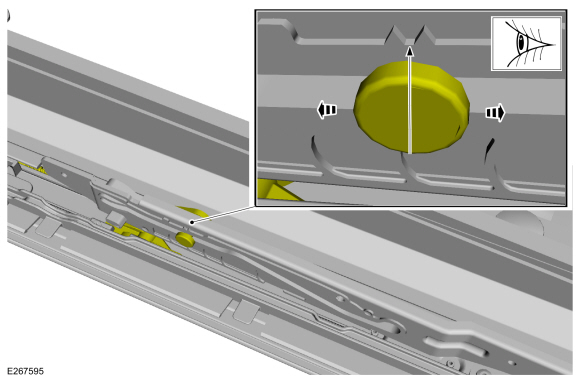
NOTICE:
It is possible for the cable mechanisms to move from
the glass closed position during shipping. If the cable mechanisms are
not in the glass closed position when the roof opening panel frame is
installed, the roof opening panel will not initialize.
On both sides, make sure the trolley pins are aligned
with the V-shaped alignment markings on the glass brackets to assure the
mechanisms are in the glass closed position. Move the cable mechanism
by hand or by pushing the trolley pin with a flat bladed screwdriver as
necessary.
Use the General Equipment: Flat-Bladed Screwdriver
-
NOTICE:
Note the position of the motors when transferring
the motors to the new frame. Make sure the motors are installed to the
new frame in the same position as removed from the old frame.
NOTE:
The cable mechanisms for the movable glass on the new frame will be in the glass closed position.
NOTE:
Install the fixed glass to the frame before installing the new frame.
Transfer parts as necessary.
-
Once all components are installed, initialize the roof opening panel.
Refer to: Power Roof Opening Panel Initialization (501-17 Roof Opening Panel, General Procedures).
Removal
NOTE:
Removal steps in this procedure may contain installation details.
Remove the roof opening panel frame.
Refer to: Roof Opening Panel Frame (501-17 Roof Opening Panel, Removal and Installation)...
Removal
NOTE:
Removal steps in this procedure may contain installation details.
Fully open the roof opening panel shield.
Vent the roof opening panel glass...
Other information:
System Operation
Power Running Board (PRB) Controls
Network Message Chart
Module Network Input MessagesRBM
Broadcast Message
Originating Module
Message Purpose
Driver door ajar status
BCM
This message is sent to the GWM and then to the RBM ...
Removal
NOTE:
Removal steps in this procedure may contain installation details.
Remove the rear bumper cover.
Refer to: Rear Bumper Cover (501-19 Bumpers, Removal and Installation).
Remove the push pins, release the locating tab and remove the liftgate module cover...


 Roof Opening Panel Fixed Glass. Removal and Installation
 Roof Opening Panel Glass. Removal and Installation