Lincoln Navigator: Front Suspension - LHD 4WD / Upper Arm. Removal and Installation
Removal
NOTICE: Suspension fasteners are critical parts that affect the performance of vital components and systems. Failure of these fasteners may result in major service expense. Use the same or equivalent parts if replacement is necessary. Do not use a replacement part of lesser quality or substitute design. Tighten fasteners as specified.
-
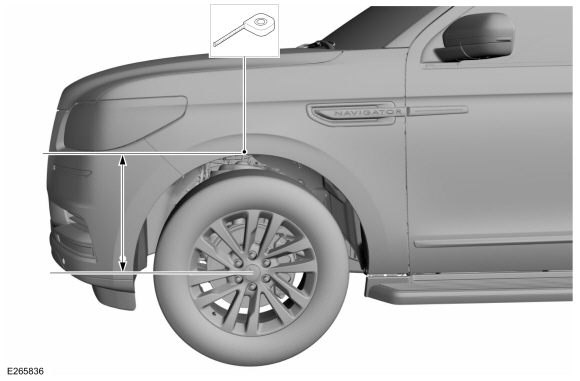
Measure the distance from the center of the hub to the
lip of the fender with the vehicle in a level, static ground position
(curb height).
 |
-
Remove the shock absorber and spring assembly.
Refer to: Shock Absorber and Spring Assembly (204-01B Front Suspension - LHD 4WD, Removal and Installation).
-
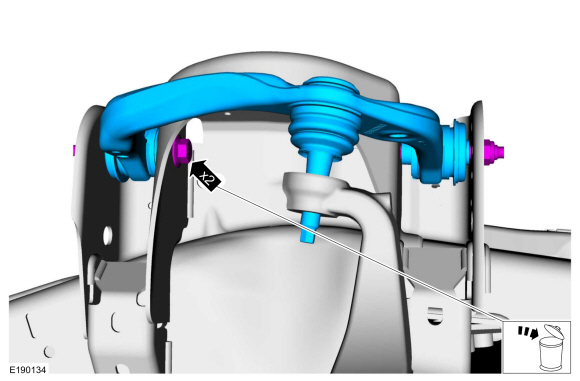
Remove and discard the 2 upper arm bolts and nuts and remove the upper arm.
 |
Installation
NOTICE: Tighten the suspension bushing fasteners with the suspension loaded or with the weight of the vehicle resting on the wheels and tires, otherwise incorrect clamp load and bushing damage may occur.
-
NOTE: Only tighten the nuts and bolts finger tight at this stage.
Install the upper arm and install the 2 new upper arm bolts and nuts.
 |
-
Install the shock absorber and spring assembly.
Refer to: Shock Absorber and Spring Assembly (204-01B Front Suspension - LHD 4WD, Removal and Installation).
-
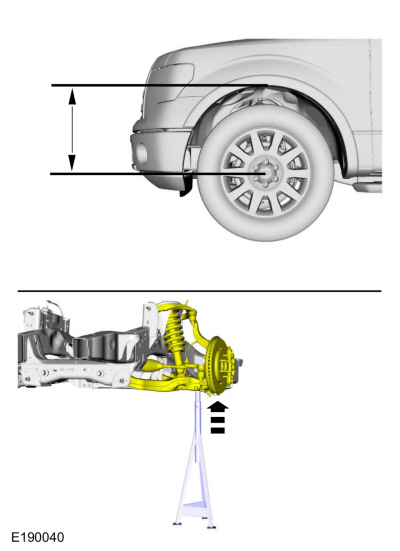
Use a suitable jack to raise the suspension until the
distance between the center of the hub and the lip of the fender is
equal to the measurement taken during removal (curb height).
 |
-
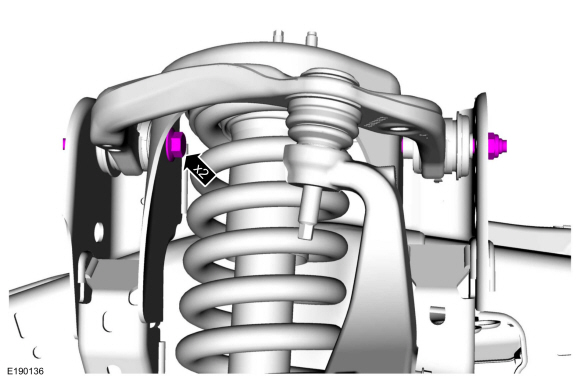
Tighten the new upper arm bolts and nuts.
Torque: 122 lb.ft (165 Nm)
 |
 Shock Absorber and Spring Assembly. Removal and Installation
Special Tool(s) /
General Equipment
204-592Separator, Lower Arm Ball JointTKIT-2006C-FFMFLMTKIT-2006C-LMTKIT-2006C-ROW
Spring Compressor
Tie Rod End Remover
Removal
NOTICE:
Suspension fasteners are critical parts that affect the
performance of vital components and systems...
 Wheel Knuckle. Removal and Installation
Special Tool(s) /
General Equipment
204-592Separator, Lower Arm Ball JointTKIT-2006C-FFMFLMTKIT-2006C-LMTKIT-2006C-ROW
Tie Rod End Remover
Removal
NOTICE:
Suspension fasteners are critical parts that affect the
performance of vital components and systems...
Other information:
Lincoln Navigator 2018-2025 Workshop Manual: Power Running Board (PRB) Motor. Removal and Installation
Removal NOTE: Removal steps in this procedure may contain installation details. NOTE: The power running board motor and drive bracket are serviced as an assembly. With the vehicle in NEUTRAL, position it on a hoist. Refer to: Jacking and Lifting (100-02 Jacking and Lifting, Description and Operation)...
Lincoln Navigator 2018-2025 Workshop Manual: Exhaust Gas Recirculation (EGR) Outlet Tube. Removal and Installation
Removal Remove the engine appearance cover retainers, release the engine appearance cover from the rear retainers and then remove the engine appearance cover. Remove the RH side air cleaner outlet pipe...
Categories
- Manuals Home
- 4th Gen Lincoln Navigator Service Manual (2018 - 2025)
- Body and Paint
- Liftgate Trim Panel. Removal and Installation
- Brake Service Mode Activation and Deactivation. General Procedures
- Front Bumper Cover. Removal and Installation
- Rear View Mirrors - System Operation and Component Description. Description and Operation
Axle Tube Bearing. Removal and Installation
Special Tool(s) / General Equipment
 205-123
(T78P-1177-A)
205-123
(T78P-1177-A)
Installer, Axle Shaft Oil Seal
 308-047
(T77F-1102-A)
308-047
(T77F-1102-A)
Remover, Bearing Cup Slide Hammer