Lincoln Navigator: Instrument Panel and Console / Instrument Panel Upper Section. Removal and Installation
Special Tool(s) /
General Equipment
Removal
NOTE:
Removal steps in this procedure may contain installation details.
-
Remove the insturment panel.
Refer to: Instrument Panel (501-12 Instrument Panel and Console, Removal and Installation).
-
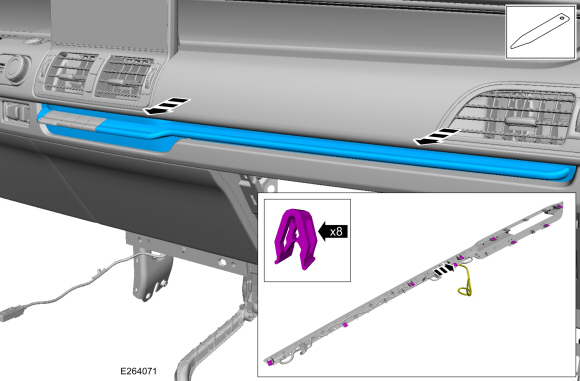
Release the clips and remove the center finish panel.
-
Disconnect the electrical connector.
Use the General Equipment: Interior Trim Remover
-
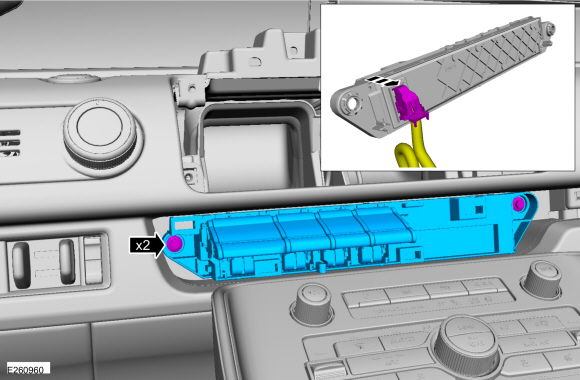
Release the clips and remove the shifter module.
-
Disconnect the electrical connector.
Torque:
22 lb.in (2.5 Nm)
-
Release the clips and remove the FDIM rear cover.
Use the General Equipment: Interior Trim Remover
-
Remove the bolt and disconnect the LVDS connector.
Torque:
80 lb.in (9 Nm)
-
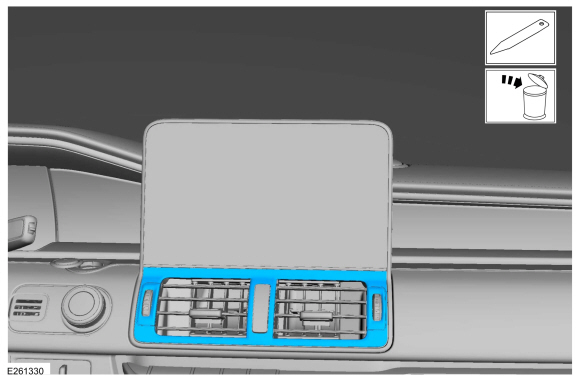
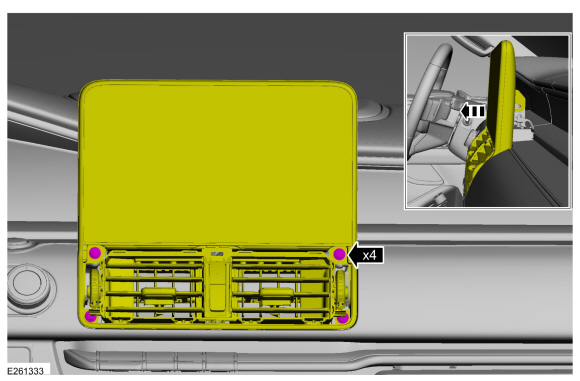
Remove the center register trim panel.
Use the General Equipment: Interior Trim Remover
-
Remove the bolts and position the FDIM and center register forward as an assembly.
Torque:
22 lb.in (2.5 Nm)
-
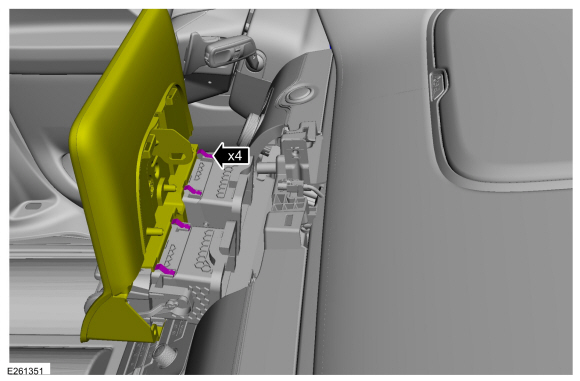
On both top and bottom of the center register. Release the clips and position the FDIM off the center register.
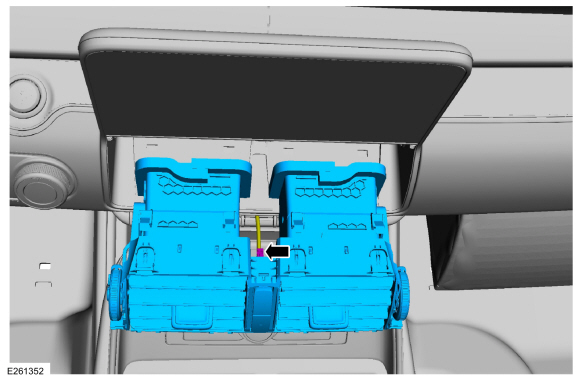
-
Disconnect the electrical connector and remove the center register.
-
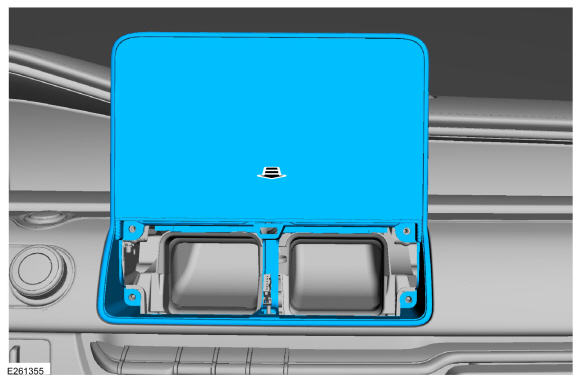
Remove the FDIM .
-
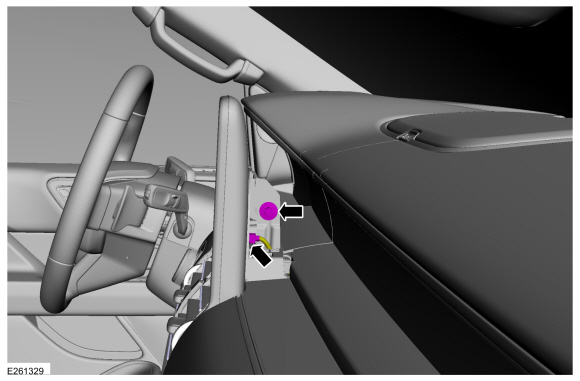
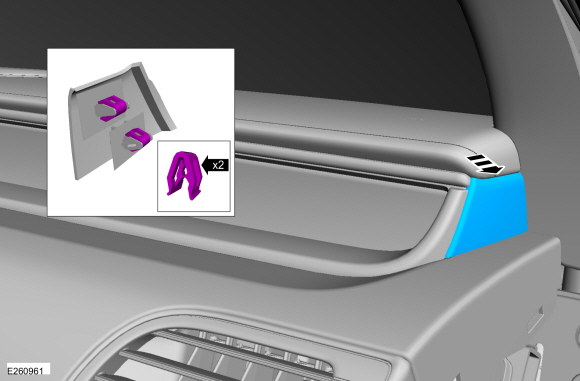
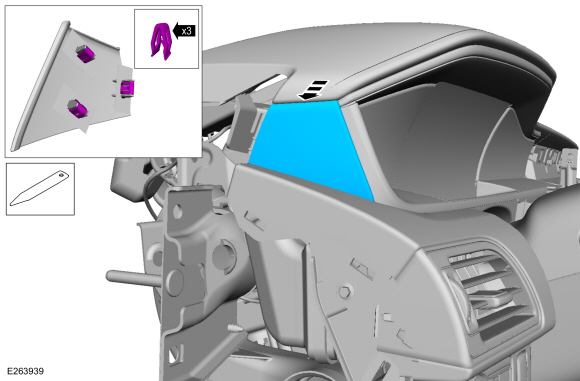
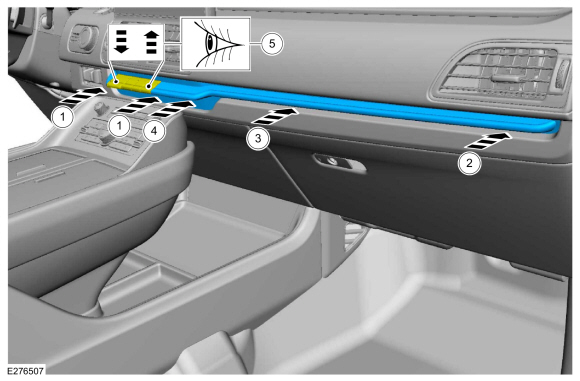
Release the clips and remove the upper RH instrument panel finish panel.
-
Remove the bolts and the instrument panel center finish panel.
-
Disconnect the electrical connectors.
Torque:
22 lb.in (2.5 Nm)
-
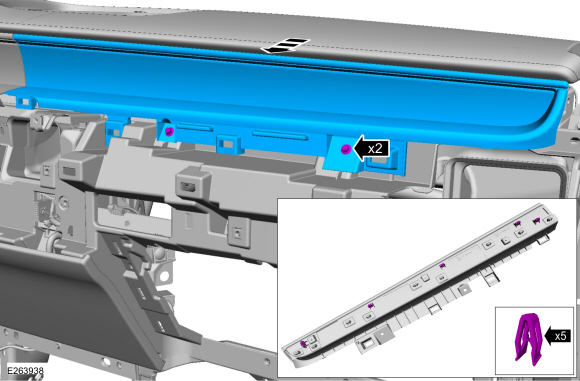
Working from the front to the rear, release the clips and remove the instrument panel speaker grille.
-
Disconnect the electrical connector.
Use the General Equipment: Interior Trim Remover
-
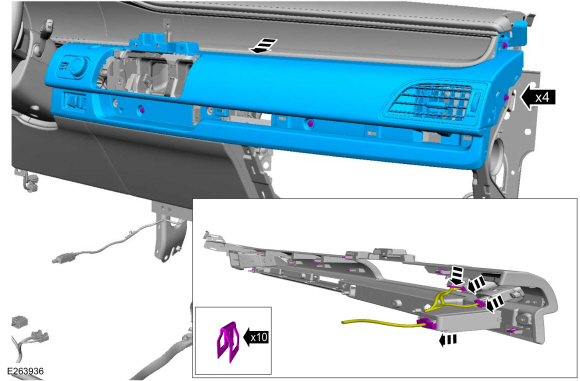
Remove the bolts release the clips and remove the upper RH finish panel.
Torque:
22 lb.in (2.5 Nm)
-
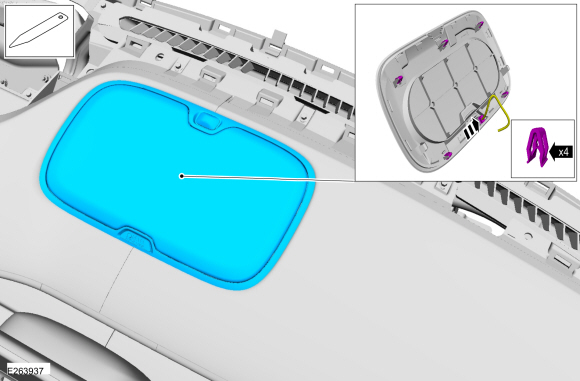
Release the clips and remove the upper LH instrument panel finish panel.
Use the General Equipment: Interior Trim Remover
-
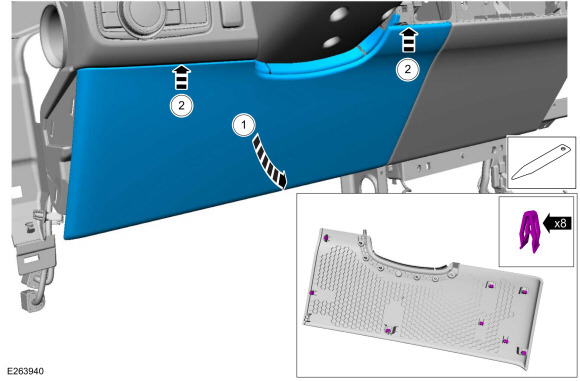
Release the clips and remove the lower LH trim panel.
-
Rotate from the bottom.
-
Lift upward.
Use the General Equipment: Interior Trim Remover
-
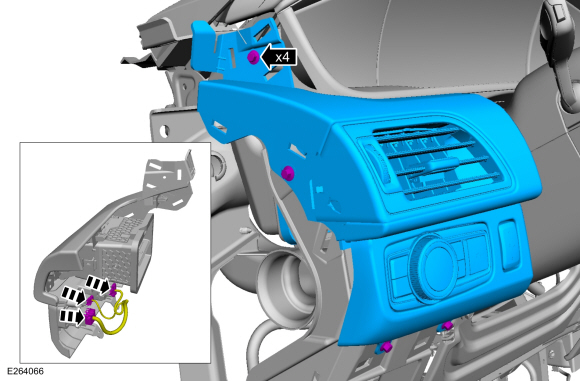
Remove the bolts and the LH trim panel.
-
Disconnect the electrical connectors.
Torque:
22 lb.in (2.5 Nm)
-
-
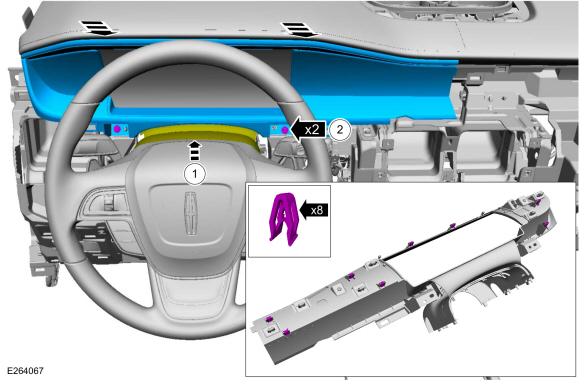
Position upwards the steering column upper steering column shroud.
-
Remove the bolts, release the clips and remove the instrument cluster trim panel.
Torque:
22 lb.in (2.5 Nm)
-
Remove the LH instrument panel bolt.
Torque:
22 lb.in (2.5 Nm)
-
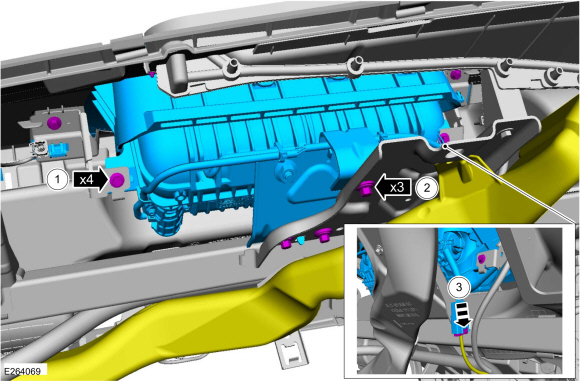
-
Remove the bracket bolts.
Torque:
22 lb.in (2.5 Nm)
-
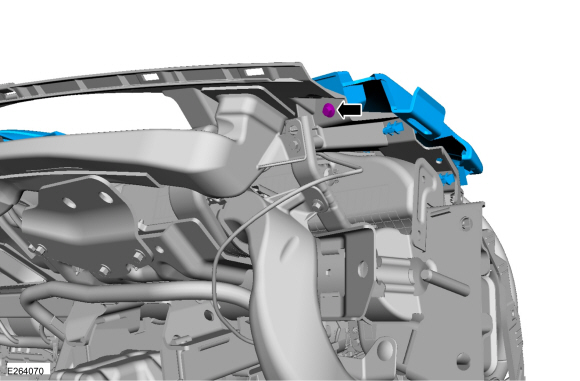
Remove the airbag to in-vheicle crossbeam bolts.
Torque:
80 lb.in (9 Nm)
-
Disconnect the electrical connector.
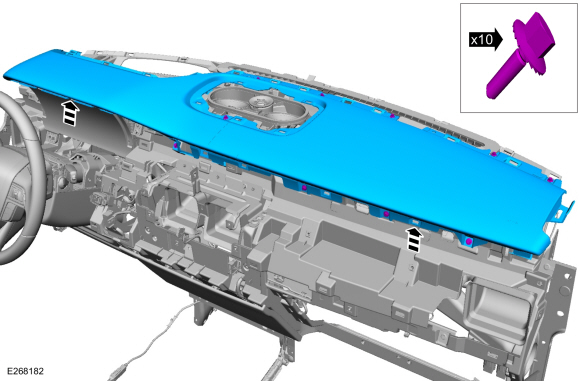
-
Remove the bolts, release the clips and remove the instrument panel upper section.
Torque:
22 lb.in (2.5 Nm)
Installation
-
To install, reverse the removal procedure.
-
-
Seat both sides of the instrument panel center finish panel around the GSM .
-
Seat the passenger side of the instrument panel center finish panel.
-
Seat the center right of the instrument panel center finish panel.
-
Seat the center left of the instrument panel center finish panel.
-
Verify the GSM P (Park) and D (Drive) buttons move without interference.
Special Tool(s) /
General Equipment
Interior Trim Remover
Removal
NOTE:
Removal steps in this procedure may contain installation details...
Removal
Release the clips and remove the overhead console.
Disconnect the electrical connectors.
Installation
To install, reverse the removal procedure...
Other information:
Activation
WARNING:
Before beginning any service procedure in this section,
refer to Safety Warnings in section 100-00 General Information. Failure
to follow this instruction may result in serious personal injury.
NOTE:
If you are using a MyKey® programmed key, the Belt-Minder®
cannot be disabled and does not time out after 5 minutes...
Special Tool(s) /
General Equipment
303-1655Tool, Camshaft Holding
Removal
NOTICE:
During engine repair procedures, cleanliness is extremely
important. Any foreign material, including any material created while
cleaning gasket surfaces, that enters the oil passages, coolant passages
or the oil pan may cause engine failure...

 Instrument Panel Center Finish Panel. Removal and Installation
 Overhead Console. Removal and Installation